
Home automation is a hot topic for consumers today with systems such as Amazon's Alexa and Apple's HomeKit among others. But home automation isn't a new topic. There were custom systems from companies such as Crestron at the very high end of the market and at the very low end, products such as the X10 system that have been around since the 1970s.
I installed an X10 based system in the mid 1990s to replace multiple timers that controlled our outdoor lights. Timers work, but they constantly need fiddling as the time of sunrise and sunset changes constantly. It's not a terrible task to adjust one or two timers, but we have a lot of different outside lights and I was adjusting six different timers about monthly.
The X10 system solved the timer update problem. One central controller that could be programmed by a computer controlled several outside lights automatically turning them on and off automatically. The system would switch the lights at sunrise and sunset, which it calculated based on the geographic coordinates of my home. That was a big improvement, but X10 was flaky. Sometimes lights would not get the signal to go on, or off. X10 is generally a unidirectional system, so there's no way to ensure that a device received a command. And since it was unidirectional, it was not possible to query a switch to determine status.
The X10 system wasn't very robust, either. Load control switches would fail periodically and require replacement. Sometimes the controller would fail, which would take the entire system off-line. I needed a better solution.
We remodeled our kitchen in 2011, which grew into other updates, such as doors. It seemed a good idea, since I was doing a lot of wiring anyway, to install a proper home automation system. After doing a quite of bit of research, I selected Lutron's Radio RA/2 system, which was about 2 years old at the time. Radio RA/2 is a whole house system, and it was their mid-priced option. Lutron's HomeWorks QS system was very nice, very advanced, and very expensive.
Lutron's family of home automation devices use their proprietary communications protocol called Clear Connect™. The protocol is robust, fast, and reliable. I've never had a problem with a light not switching or dimming when a command button is pressed. Even better, the system is open to integration and the protocol is very well documented.
My system consists of a main repeater, which I installed in a closet. After adding an upper shelf to this closet, I hung the main repeater under the shelf on the far left side.
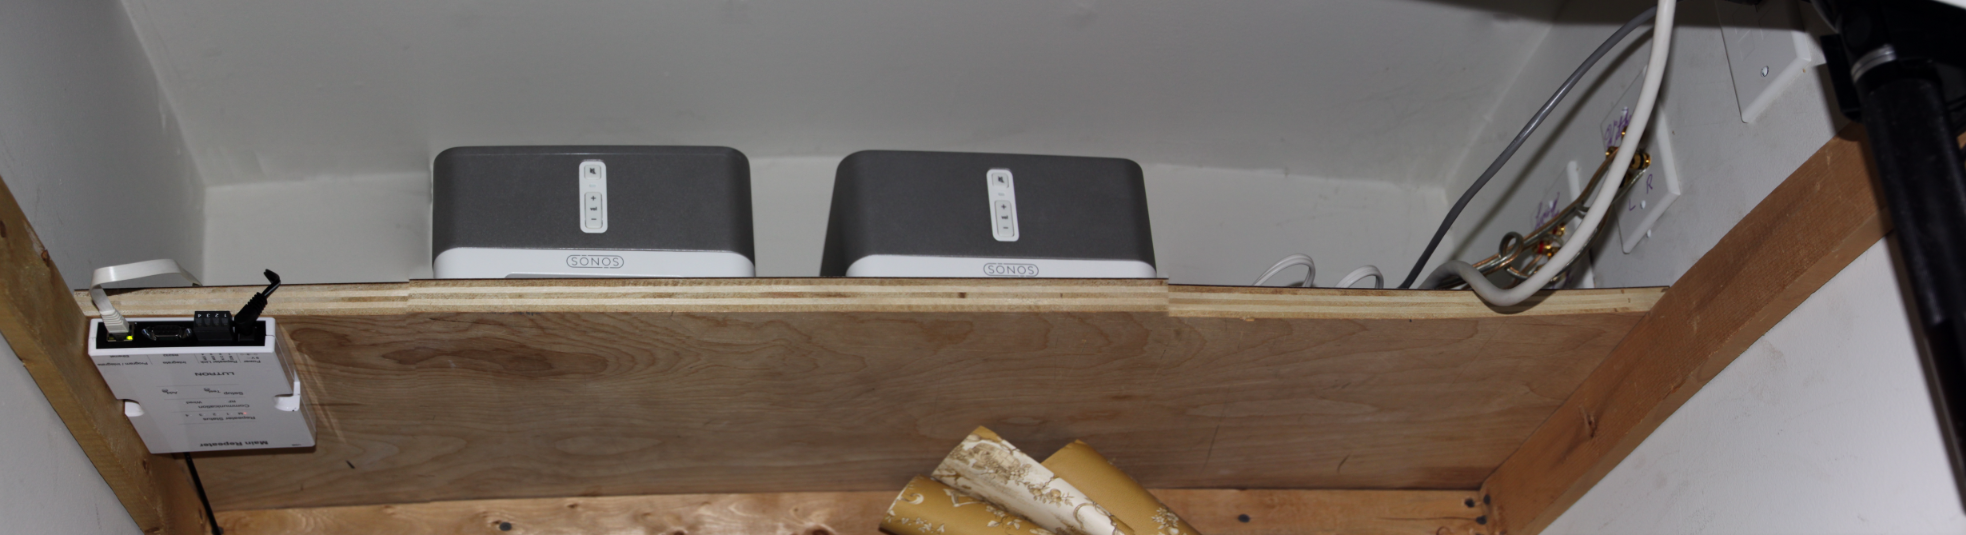
The main repeater is mandatory for the system. Lutron provides a program to certified installers that allow the main repeater to be programmed. Then each device in the system is programmed via the main repeater. While not necessary, my main repeater is tied into my home network. This makes programming changes in the system simple as my programming computer is always connected to the main repeater. Unfortunately, the Lutron software only runs on Windows, so I have a Windows 10 VM on my MacPro that runs the Lutron application.
The Ethernet connection also serves two other functions. The main repeater's clock updates via the network connection. And it's possible to read the configuration of the entire home automation system from the main repeater, which it reports via XML. The network connection also allows me to control my lights from an app on my iPhones and iPad, which is useful. And finally, Lutron publishes the interface specification for the Radio RA/2 system so that one can extend and customize the system via code.
While I could connect a computer to the main repeater via an RS-232 link, most computers do not support RS-232 ports. However, it's easier to connect via a telnet session such as this.
doggie@labrador:~>telnet lutron
Trying 192.168.1.2...
Connected to 192.168.1.2.
Escape character is '^]'.
login: name
password: password

GNET> ~OUTPUT,2,1,100.00
~OUTPUT,2,29,6
#output,5,1,100
GNET> ~OUTPUT,5,1,100.00
~OUTPUT,5,29,6
~OUTPUT,5,30,1,100.00
GNET> #output,44,1,0
~OUTPUT,4,1,0.00
~DEVICE,6,1,3
~OUTPUT,3,1,80.00
~OUTPUT,3,29,8
~OUTPUT,3,30,1,80.00
~DEVICE,6,81,9,1
~OUTPUT,3,1,0.00
~OUTPUT,3,29,0
~OUTPUT,3,30,1,0.00
~DEVICE,6,81,9,0
~DEVICE,8,3,3
~TIMECLOCK,7,5,10
~TIMECLOCK,7,5,1
~OUTPUT,9,1,0.00
The main repeater is showing that some devices, such as the device with integration ID #2 received action code 1, and the light was set to 100%. We also see that the time clock automatically sent the device with integration code 7, action code 5, and a value of 10.
The question is, what devices have integration IDs of 2, 5, 7, etc? The main repeater can give that information as well. We can do an http get from the master repeater, which will return the configuration XML.
The configuration download looks something this:
Last login: Wed Mar 20 23:08:34 on ttys000
komondor:~ doggy$ curl lutron/DbXmlInfo.xml
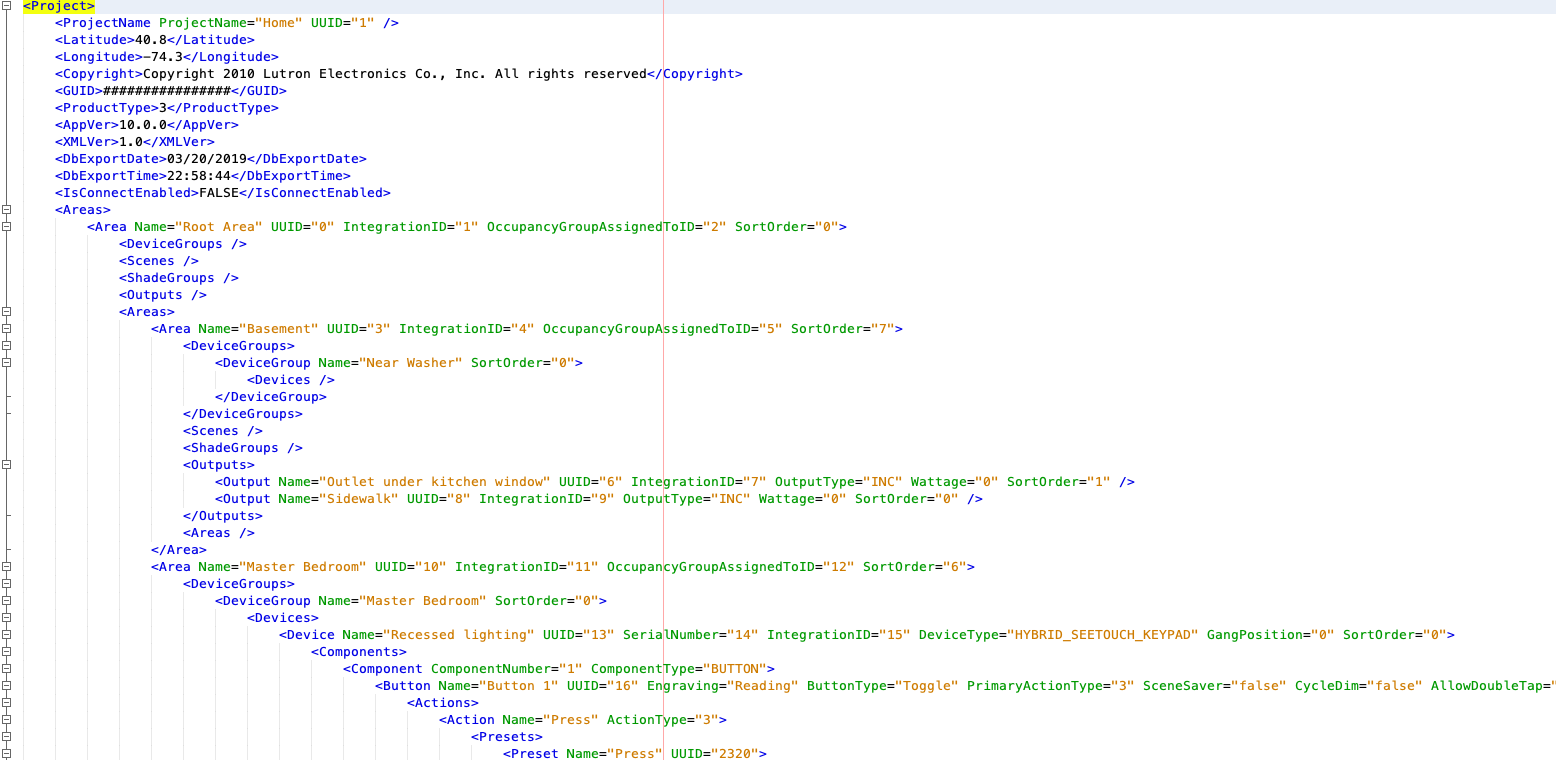
Integrating, therefore, is a matter of parsing the XML to find the Area Names, which in a Radio RA/2 implementation, are the various rooms in the house. Each Area, has Devices, Shades and Outputs. Some devices are simple, like the outputs which have an OutputType of INC which is a dimmer for incandescent lighting. Other output types, such as AUTO_DETECT are dimmers that are capable of dimming LED and low voltage lighting that uses either magnetic or electronic transformers.
Once the integration program finds the various outputs, by matching the OutputType with the capability chart, the program can control the device by sending an appropriate action code to the IntegrationID associated with that output. Pretty simple.
Some devices have more complex structures, such as the multiple button See Touch keyboards. These devices have a number of Components and generally each component has a ComponentType of BUTTON. Each button has a type such as SingleAction, Toggle, or AdvancedToggle. A single action could be to set a light to a specific light level. Or it might set multiple lights each to different lighting levels and each light could delay a number of seconds before it started to be set to the desired lighting level and it could also be set to fade to that desired level over a given number of seconds.
Here, the button is defined as SingleAction, which means each time it is pressed, it sets the lights to precisely the programmed level. A Toggle type would set the lights to the defined level, after the specified delay by fading on for the defined number of seconds, but if the outputs were already on, toggle would turn them off, again delaying and fading as specified. An AdvancedToggle allows the time clock in the main repeater to be set to different modes. For example, you can program the normal schedule for when you are home and a different schedule for when you are on vacation. Pressing an AdvancedToggle button would toggle between the special schedule, vacation, and normal. You can define multiple special schedules and assign different buttons to toggle them on and off.
For example: 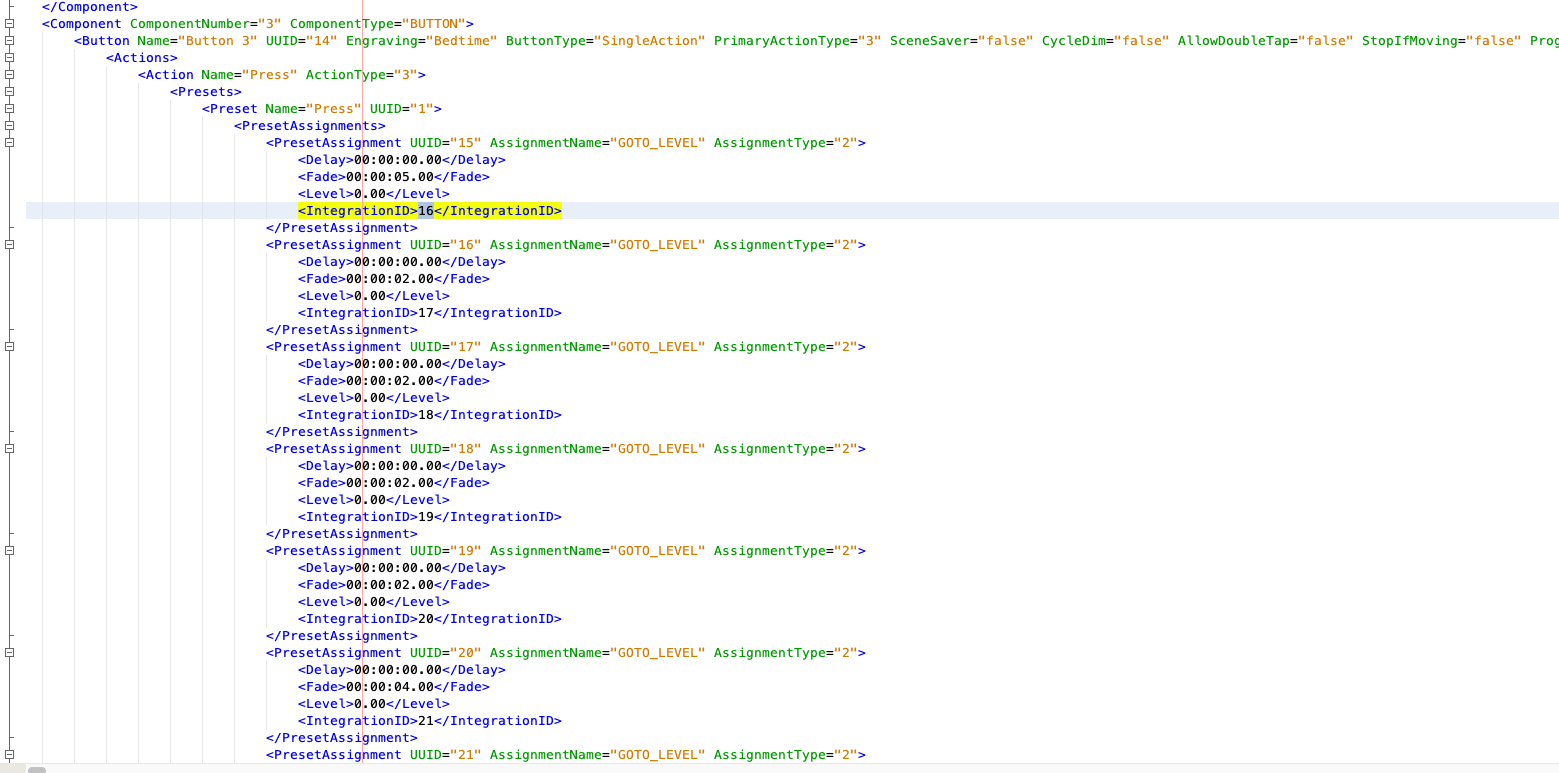
Here button #3 on this 6 button keyboard is labeled Bedtime. When the button is pressed, the Press action occurs, which is to send a GOTO_LEVEL command the various outputs denoted by their IntegrationID that they should set the lighting level to Level percentage, zero is off, after delaying Delay seconds and should take Fade seconds from the time the light starts changing intensity until it reaches the value set for Level.